


The LiquidCrystal library allows you to control LCD displays that are compatible with the Hitachi HD44780 driver. These displays are commonly used in electronics projects due to their simplicity and versatility. They typically feature a 16-pin interface, which includes registers for data and instructions, power supply lines, and LED backlight controls.
The LCDs have a parallel interface, meaning that the microcontroller has to manipulate several interface pins at once to control the display. This can be done in either 4-bit or 8-bit mode; most Arduino users prefer the 4-bit mode as it conserves I/O pins. The LiquidCrystal library abstracts much of the complexity involved in interfacing with these displays.
Hardware Required
To set up an LCD display with Arduino, you will need:
- Arduino board (e.g., UNO, Mega)
- LCD screen compatible with Hitachi HD44780
- 10k ohm potentiometer
- 220-ohm resistor
- Breadboard
- Hook-up wires
- Pin headers (for soldering to LCD)
Circuit
To wire your LCD screen to your board, connect the following pins:
- RS → Digital Pin 12
- Enable → Digital Pin 11
- D4 → Digital Pin 5
- D5 → Digital Pin 4
- D6 → Digital Pin 3
- D7 → Digital Pin 2
- R/W → GND
- VSS → GND
- VCC → +5V
- LED+ → +5V via 220-ohm resistor
- LED− → GND
Additionally, connect a potentiometer between +5V and GND with its wiper connected to VO (pin 3) on the LCD for contrast adjustment.
Schematic
The schematic (made using Fritzing) visually represents how each pin on the LCD connects to the Arduino and other components like resistors and potentiometers.
Hello World Example
This basic example prints “hello, world!” on the LCD and shows elapsed time:
#include <LiquidCrystal.h>
LiquidCrystal lcd(12, 11, 5, 4, 3, 2);
void setup() {
lcd.begin(16,2);
lcd.print(“hello, world!”);
}
void loop() {
lcd.setCursor(0,1);
lcd.print(millis()/1000);
}
This sketch prints “Hello World!” to the LCD and shows the time.
Uploading the Sketch to Arduino
Upload via Arduino IDE using a USB connection. Ensure correct board and port are selected.
Verifying Output on the LCD
Once uploaded, “hello, world!” appears on line one. Line two updates every second with elapsed time.
Autoscroll Example
How Autoscroll Works in LCDs
autoscroll() moves all the text one space to the left each time a letter is added, allowing dynamic text effects without manual scrolling logic.
Writing Code to Demonstrate Autoscroll
Use autoscroll() and noAutoscroll() methods:
lcd.setCursor(16,1);
lcd.autoscroll();
lcd.print(“1234567890”);
Practical Applications of Autoscroll
Useful for displaying sensor logs or serial input that exceeds display width.

Blink Example
Controlling Backlight or Text Visibility with Blink
The blink() method toggles a block-style cursor:
lcd.blink();
This sketch prints “Hello World!” to the LCD and makes the cursor block blink.
Timing and Delay Functions in Blink Code
Use delay() between blink state changes for visible feedback:
delay(3000);
Enhancing Visual Feedback with Blinking Text
Blinking can indicate user input fields or alert statuses.
Cursor
Enabling and Disabling the Cursor Display
Toggle underscore-style cursor using:
lcd.cursor(); // On
lcd.noCursor(); // Off
Customizing Cursor Appearance and Behavior
Combine blinking and positioning for interactive UIs.
Display Example
Showing Static Messages on LCD Screens
Use display() and noDisplay() methods:
lcd.display();
lcd.noDisplay();
The text to be displayed will still be preserved when you use noDisplay()—ideal for temporarily hiding content.
Formatting Text for Readability
Use setCursor(col,row) before printing each line for alignment.
Scroll Example
Horizontal Scrolling Techniques for Long Texts
Utilize scrollDisplayLeft() or scrollDisplayRight():
lcd.scrollDisplayLeft();
Using Built-in Functions for Smooth Scrolling
Combine scrolling with delay() inside loops for animated effects:
for(int i=0;i<13;i++){
lcd.scrollDisplayLeft();
delay(150);
}
Serial to Display Example
Receiving Data from Serial Monitor
Initialize serial communication at setup:
Serial.begin(9600);
Displaying Serial Input on LCD in Real-Time
Read characters from Serial buffer and write them directly:
while(Serial.available()){
lcd.write(Serial.read());
}
This example sketch accepts serial input from a host computer and displays it on the LCD.
Set Cursor Example
Positioning Text Precisely on the Screen
Use setCursor(col,row) for exact placement:
lcd.setCursor(15,1); // Bottom right of a 16×2 display
Managing Multi-Line Displays with Cursor Control
Loop through rows/columns dynamically for full-screen updates.
Text Direction Example
Setting Left-to-Right or Right-to-Left Text Flow
Configure direction using:
lcd.leftToRight();
lcd.rightToLeft();
rightToLeft() causes text to flow to the left from the cursor, useful for RTL languages like Arabic or Hebrew.
Adapting LCD Output for Different Languages
Switch direction mid-loop based on character range or language context.
Custom Character
Creating User-Defined Characters with CGRAM
Define custom glyphs as byte arrays up to eight characters:
byte heart[8] = {
B00000,
B01010,
B11111,
B11111,
B11111,
B01110,
B00100,
B00000 };
lcd.createChar(0, heart);
This sketch prints “I Arduino!” and a little dancing man using custom characters stored in CGRAM.
Designing Pixel Maps for Custom Glyphs
Each array element represents one row of pixels (5×8 matrix).
Uploading and Using Custom Characters in Code
Print them using lcd.write(byte(index)) after defining them via createChar().
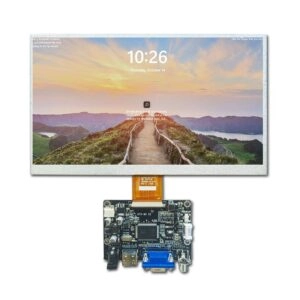
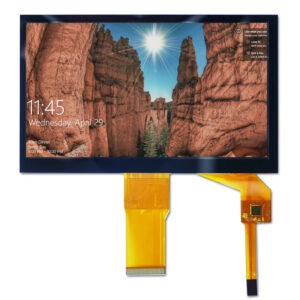
Get the Best Liquid Crystal Displays (LCD) with Arduino from Miqidisplay
For premium quality and reliable performance in your Arduino projects, Miqidisplay offers a wide range of advanced display solutions. Miqidisplay is a trusted provider of advanced display technologies and solutions, offering a comprehensive portfolio including LCD, TFT, IPS, OLED displays, and specialized accessories.
Whether you’re building prototypes or mass-producing embedded systems:
- Over 90% of orders ship within the same day
- Our facilities are TS-16949, ISO-9001 and ISO-14001 certified
- Real-time support available for pre-sales consultation through post-sales assistance
- We meet diverse customization needs through precisely designed display solutions
From HDMI TFT Displays suitable for Raspberry Pi integration to industrial-grade bar type screens with sunlight readability—every product is engineered for durability. Our products are widely used in industrial control equipment, medical care, smart homes, automotive and vehicle displays, making them ideal not only for hobbyists but also professionals across sectors.
If you’re looking for custom solutions tailored specifically for your application—whether it’s modifying backlight brightness or integrating specific connectors—Miqidisplay’s engineering team has you covered. Work with our engineering experts to create the perfect display for your application.
FAQ
Q: Can I use any LCD screen with Arduino?
A: No. Ensure that your screen is compatible with Hitachi HD44780 driver as required by LiquidCrystal library.
Q: What’s better—4-bit or 8-bit mode?
A: For most applications involving text output only, you can do most everything in 4-bit mode, which saves valuable I/O pins.
Q: How do I power my LCD?
A: Connect VCC pin of LCD module to +5V supply from Arduino. Use a potentiometer between VO pin for contrast adjustment.
Q: Where can I buy reliable lcd display modules?
A: Miqidisplay is a trusted provider of advanced display technologies, offering both standard modules and customizable options globally across over 200+ countries and regions.
Q: Can I create custom icons?
A: Yes! Use createChar() function in LiquidCrystal library along with binary arrays representing each row of pixels in an icon.