


Attaching a DSI (Display Serial Interface) display to your Raspberry Pi can really boost the look of your project. Whether you’re crafting a kiosk, a touchscreen setup, or an industrial control system, knowing how to hook up and adjust a DSI display is super important. This guide takes you through every single step to make sure your Raspberry Pi DSI display works smoothly.
Key Takeaways
- To set up a DSI display on your Raspberry Pi, you’ll need a matching display, a 15-pin FPC cable, and the most recent Raspberry Pi OS.
- Edit the config.txt file to turn on display options and add the right drivers for your kernel version.
- The display links up via a unique 15-pin MIPI DSI port on your Pi. It uses a 1mm pitch vertical FPC ribbon connector.
Hardware Components and Requirements
Before you begin, make sure you have these items ready:
- Raspberry Pi board (Pi 4B or newer is best)
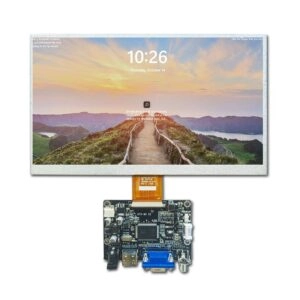
- Compatible DSI display (like the official 7-inch touchscreen)
- 15-pin MIPI DSI cable
- MicroSD card (16GB or bigger)
- 5V/3A power supply
- External monitor (just for the setup phase)
- Keyboard and mouse
The Raspberry Pi DSI display setup calls for specific parts to pair with different screen types.
Preparing Your Raspberry Pi
First, put the latest Raspberry Pi OS on your microSD card with Raspberry Pi Imager. Pop the SD card into your Pi. Then, hook it up to an external monitor using HDMI for the first setup. Turn on SSH by adding an empty file called ssh in the boot section.
Your Pi needs a solid power source to meet the DSI display’s needs. A 5V/3A adapter works well with most Pi models. It helps avoid screen flickering or other issues.
Display Driver Compatibility Check
Not every display works right away. Make sure your picked screen is okay with the Linux kernel in Raspberry Pi OS.
The main Linux kernel has drivers for common displays like the 7-inch Raspberry Pi DSI display, Ilitek ILI9881C panels, and Sitronix ST7701 screens.
If you’ve got a third-party screen that’s not supported, you might have to create or find custom drivers using its datasheet.
SD Card Setup Process
- Grab Raspberry Pi OS from raspberrypi.org.
- Put it on the card with Raspberry Pi Imager.
- Find config.txt in the boot folder and open it.
- Add these lines:
dtoverlay=vc4-kms-v3ddisplay_default_lcd=1
- Save it and slide the SD card into your Pi.
Writing the OS image is best done with Raspberry Pi Imager. It’s a more trusty tool than Win32DiskImager.
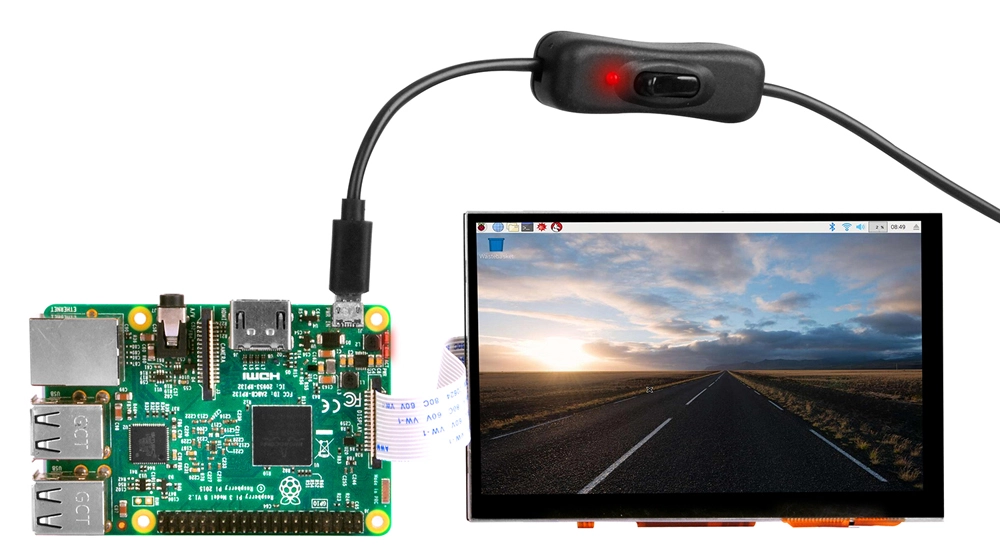
Connecting Display to Board
Attach one side of the FPC ribbon cable to the DSI port on your Raspberry Pi. Then, connect the other side to the matching port on your display board.
The DSI display cable fits into the board’s DSI port. Make sure the metal contacts face the correct way to avoid any damage.
If you have mounting hardware, use it to hold both pieces steady.
Power and Cable Management
Having steady power is really important.
The Raspberry Pi DSI display can pull up to 300mA through the 3.3V rail when it’s super bright.
Don’t power both gadgets from the same source if the screen is very bright. Use clips or brackets to keep cables in place. This stops them from coming loose if they’re moved or bumped.
To keep your DSI display setup safe, fasten all cables tightly. This avoids stress and keeps connections strong.
Software Configuration Steps
Put in any needed drivers for your exact screen model:
sudo apt-get updatesudo apt-get upgrade
Tweak /boot/config.txt with the right resolution settings:
framebuffer_width=800framebuffer_height=480
Restart your Pi after saving the changes.
Your Raspberry Pi DSI display won’t work right without proper changes to config.txt.
For touchscreens, add matchbox-keyboard like this:
sudo apt-get install matchbox-keyboard
Screen Resolution and Orientation
Change resolution settings in config.txt. For instance:
display_rotate=1 # Turns screen 90 degreesdisplay_rotate=2 # Turns screen upside down
You can set custom resolutions up to 1920×1080 by changing ‘framebuffer_width’ and ‘framebuffer_height’ in ‘/boot/config.txt’.
If your model allows it, adjust brightness using PWM or I2C interfaces.
Display Testing and Verification
After hooking it up, start your system. You should see the desktop on your new screen.
Run the built-in Raspberry Pi DSI display tests to look for dead pixels, check color correctness, and see if brightness is even.
Try the touch feature by tapping and swiping across all corners of the screen. If something’s off, use VNC or SSH to fix it from afar.
Common Issues and Solutions
No Display Output:
- Look at the ribbon cable direction.
- Make sure the power source is good.
- Double-check config.txt entries.
Touch Not Working:
- Be sure the right I2C lines are connected.
- Put the touch drivers back in.
Flickering Screen:
- Get a better power adapter.
- Don’t power through USB from other devices.
Many Raspberry Pi DSI display troubles come from old drivers or wrong setup files.
Frequently Asked Questions
Can I use multiple displays?
No, most models only handle one native DSI connection at once.
Will USB boot affect my setup?
It won’t matter. USB boot works okay with displays set up right.
Does GPIO functionality change?
DSI uses its own paths. GPIO stays fully usable unless you change it for stuff like I2C touch input.
Can I switch between HDMI and DSI easily?
Not really. You have to edit config.txt every time you switch.
Will OS updates break my setup?
Small hiccups might happen during updates, but they usually fix themselves after a restart.
Summing Up
With this guide, you’ve figured out how to build a strong visual setup using a DSI-connected screen on your Raspberry Pi. From checking drivers to tweaking resolution and handling power needs, each step makes sure things work great. This fits all kinds of uses like kiosks, industrial panels, or smart home systems.
Source the Best Display for Raspberry Pi from Miqidisplay for Your Business
When looking for top-notch screens made for systems like Raspberry Pi projects, Miqidisplay shines as a top name in cutting-edge visual tools. Miqidisplay is a reliable source for advanced display tech, with a wide range of products like LCD, TFT, IPS, OLED displays, and special add-ons.
They offer sharp, stretched screens like the 12.5 inch Bar Type TFT LCD Stretched Display with 2400 x 90 pixels, great for tight spaces. Or try the 7 inch 1024*600 Industrial LVDS TFT Touch Panel LVDS Interface, built tough for clear views in hard conditions.
What makes Miqidisplay special?
- Over 90% of orders go out the same day.
- They do many checks before shipping to make sure products work well.
- Their places are certified with TS-16949, ISO-9001, and ISO-14001.
Whether you’re putting screens in medical tools or car dashboards where trust is key, Miqidisplay gives custom help with years of know-how. Their 20+ years of top skills make sure every product hits high standards while staying affordable even for big orders.