


Introduction to Arduino TFT Displays
What is a TFT Display and Why Opt for It with Arduino?
TFT stands for Thin Film Transistor. It’s a kind of LCD (liquid crystal display) that employs thin-film transistor technology to enhance visual clarity. Unlike conventional LCDs, TFT displays deliver more vivid hues, crisper visuals, and swifter refresh speeds. A compelling reason to select a TFT for Arduino lies in its capacity to present distinct graphics and text, even in vibrant color. Additionally, certain TFT displays include touchscreen capabilities. These enable more inventive interaction with your Arduino creations.
The touchscreen variant, known as an arduino tft touch display, allows you to manage devices through taps or swipes. This imparts a contemporary, engaging quality to your work. With this technology, your Arduino screen transcends being merely a monitor. Instead, it becomes an integral component of your interface.
Common Use Cases for Arduino TFT Displays
TFT displays find application in numerous diverse endeavors. They’re widely used in arduino tft display project setups, such as IoT dashboards, smart home interfaces, and homemade weather monitors. Some enthusiasts employ them in portable gaming gadgets, crafting vibrant and interactive entertainment. Others construct control hubs for robots or machinery. Here, the lcd tft display arduino connection is pivotal. It permits users to transmit data and instructions to the screen, displaying real-time updates and controls. These displays render your Arduino work more user-friendly and visually striking.
Choosing the Ideal Size and Resolution for Your Project
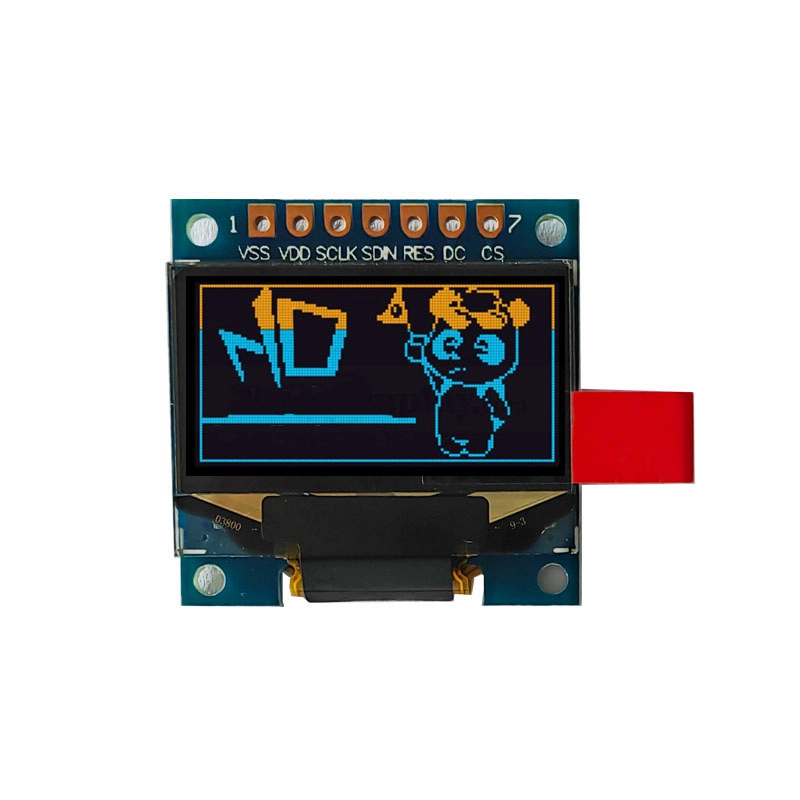
Small Displays (1.8” to 2.4”)
Compact TFT displays, ranging from 1.8 to 2.4 inches, excel when your project demands portability or limited space. They suit basic readouts perfectly. A typical resolution for this size is 128×160 or 240×320 pixels. Though small, the screen can still convey essential details like digits, icons, or modest visuals. For instance, if you’re designing a wearable fitness tracker, you might opt for a petite arduino tft touch display. This keeps your project lightweight and streamlined.
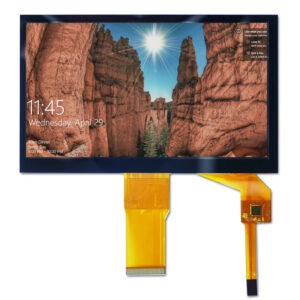
Medium Displays (3.5” to 4.3”)
Mid-sized displays provide greater space for text, icons, and images. They’re simpler to read. Moreover, they can accommodate additional controls or features on a single screen. Resolutions typically range from 320×480 to 480×800 pixels. These suit smart home setups or robots requiring a screen for status updates or user commands. If you’re curious about how to use tft display with arduino for such tasks, libraries like Adafruit GFX simplify the process significantly.
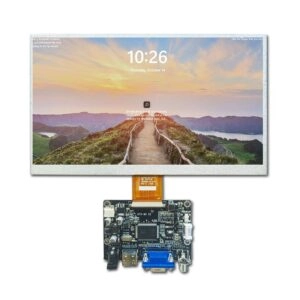
Large Displays (5” to 7”)
For projects needing intricate details or video displays, larger screens are optimal. These usually offer resolutions from 800×480 to 1024×600 pixels. They’re less portable, yet they provide a sharp view of extensive data or complex menus. They’re ideal for crafting DIY arcade games or dashboards displaying weather, energy consumption, or home automation controls. For such cases, the display lcd tft arduino setup requires careful planning. This ensures the larger screen and power demands are met effectively.
How to Connect and Program TFT Displays with Arduino
Step-by-Step Guide to Wiring (SPI vs. Parallel Interfaces)
To link a TFT display to an Arduino, you must grasp its interface. Smaller displays often utilize SPI (Serial Peripheral Interface). This requires only a few wires. Conversely, larger or higher-resolution screens may use a parallel interface. This demands more pins but operates more rapidly.
For SPI displays, attach the MISO, MOSI, SCK, CS, DC, and RST pins to corresponding Arduino pins. If you’re seeking guidance on how to connect tft display to arduino, most manufacturers supply wiring schematics. Take care to avoid mismatching power connections. For instance, using 5V instead of 3.3V might harm certain displays.
Parallel interfaces transmit data across multiple lines simultaneously. This requires additional wires. However, the data transfers faster. These are typically used with expansive screens displaying numerous pixels. Regardless, precise wiring and a reliable power source are crucial for a functional setup.
Optimizing Code for Different Resolutions
Once your screen is connected, coding begins. Libraries like Adafruit GFX or TFT_eSPI streamline controlling various display types. They provide tools to sketch shapes, text, or even upload images.
Each resolution demands specific adjustments. If your project involves multiple screen sizes, define variables for width and height in your code. This way, upgrading your screen requires tweaking only one section. When learning how to use tft display with arduino, these libraries save considerable effort.
Advanced Features and Troubleshooting
Integrating Touchscreen Functionality
If your display includes a touchscreen, you’ll need a touchscreen controller and driver library. Resistive touchscreens detect pressure, while capacitive ones sense electrical signals. Both require calibration. With proper coding, your arduino tft touch display can manage sliders, menus, or buttons seamlessly.
In IoT projects, this allows users to tweak settings directly on the screen. For example, you might create a thermostat. A tap adjusts the temperature up or down. You can also switch screens or activate functions with one touch.
Solving Common Issues (Flickering, Color Inaccuracy)
Occasionally, displays malfunction initially. Flickering may stem from an unstable power supply or loose connections. Employ a steady 5V or 3.3V source. Ensure wires are securely fastened. If colors appear incorrect, verify your code’s color settings or library configuration.
Grounding is also vital. If your screen acts erratically, connect all grounds—Arduino, display, and power source—together. In a lcd tft display arduino project, minor wiring tweaks can yield significant improvements.
Custom Solutions for Unique Projects
Miqidisplay Arduino TFT Display Customization Service
Not every project suits a standard display. Miqidisplay offers tailored solutions. These include custom PCBs, enhanced touchscreen support, or robust bonding for screen durability. If your Arduino project must withstand outdoor conditions or rough use, these upgrades ensure longevity.
With over 20 years of expertise, Miqidisplay serves global clients. Whether it’s a basic prototype or a polished product, their team customizes the display to your precise specifications. For a professional arduino tft display project, they guide you from concept to completion.
Frequently Asked Questions (FAQs)
- What’s the difference between TFT and OLED displays for Arduino?
TFT displays use a backlight. They excel in bright environments. OLEDs lack a backlight and offer richer blacks. However, they consume more power for bright visuals. - How do I choose between resistive and capacitive touchscreens?
Resistive screens are more affordable. They work with any object. Capacitive screens are smoother and support multi-touch. Select based on budget and requirements. - Can I use a high-resolution TFT display with Arduino Uno?
Yes, but limitations exist. High-res screens demand more RAM. You may need to shrink images or use external memory. - Why does my TFT display flicker when powered by USB?
USB power can be insufficient. Try an external power supply. Alternatively, add a capacitor to stabilize voltage. - Does Miqidisplay offer waterproof TFT displays for outdoor projects?
Yes. They provide waterproof versions with IP-rated protection against rain, dust, and sunlight.
Final Thoughts
Selecting the perfect TFT display resembles choosing an ideal camera lens. It reshapes your perspective. Whether crafting a vintage gaming console or a solar-powered weather station, Miqidisplay’s Arduino TFT Display Customization Service transforms your ideas into pixel-perfect reality.
Unsure about sizes? Our engineers can assist with prototyping. Email us a sketch of your project. We’ll reply with a complimentary compatibility checklist!